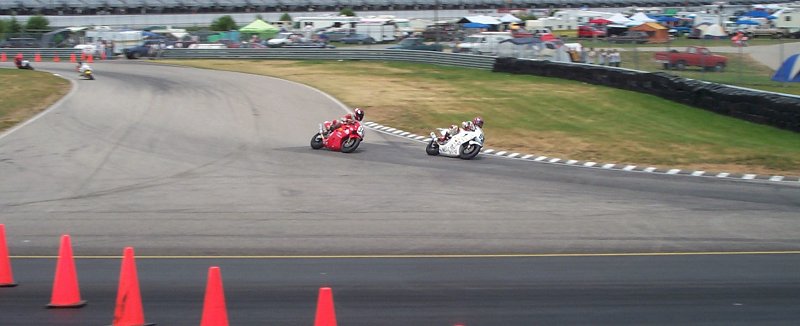
Lap 4, you can see how quickly Paul was moving forward! Only 100ft later, Paul lost the rear end at the turn 2 transition and was out for the race. GTU Photo by Scott Sewade
Lap 4, you can see how quickly Paul was moving forward! Only 100ft later, Paul lost the rear end at the turn 2 transition and was out for the race. GTU Photo by Scott Sewade